Reels: The ‘movie trailer’ of you.
Let’s talk about Reels (a.k.a. Showreels, Demo Reels, Sizzle Reels). Those 1-3 minute videos that edit down years’ worth of footage into a brief, entertaining introduction to you and your best work.
As an animation director and art director, I’ve reviewed hundreds of reels by actors, animators, cinematographers, directors, editors and production companies (to name a few). There’s an ocean of reels out there, with over 2 million videos titled “showreel” uploaded to YouTube alone, and more are added every minute.
This all leads one to wonder…

How can I create a reel that stands out?
Well, wonder no more. In this article, I’m going to cover the elements that make a remarkable reel and 7 steps for crafting one of your own. So, let’s get started.
Part 1: What makes a remarkable reel?
A remarkable reel:
- Starts and ends strong
- Is full of interesting and engaging footage
- Highlights the subject’s strengths and personality
- Is entertaining as a stand-alone video.
A not-so-remarkable reel:
- Starts and ends with a whimper
- Confuses me as to what the creator actually does
- Jumps around randomly
- Is painful to watch, or (worse) a total bore.
Specialist vs. Generalist Reels
While each variety of showreel has its own quirks and conventions, it’s worth distinguishing between two broad categories: Specialist Reels and Generalist Reels.
Specialist Reels
Specialist Reels are dedicated to showcasing one specific skill or role (actors create acting reels, directors create directing reels, etc.), and the viewer can assume that every shot in the reel showcases that skill.
Here’s an example of a solid Specialist Cinematography Reel:
Generalist Reels
Generalist Reels, on the other hand, showcase a combination of skills or roles that the creator thinks will make them a unique candidate. In my reel, for example, I introduce myself as a writer, designer, illustrator, animator, art director, and animation director — and I weave together footage representing each of these skill sets.
Here’s my Animation Generalist Reel:
Which is right for you?
Generalist Reels are a good choice if…
- You’re early in your career and haven’t picked a specialty.
- You’ve consciously chosen to develop multiple skill sets.
- You’re interested in working at a variety of smaller companies that benefit from someone who can ‘do-it-all.’
Specialist Reels are a good choice if…
- You’ve picked a specialty and don’t expect to change roles.
- You want to advance quicker in your career and work for more established studios and production companies.
- You have multiple specialties, with enough footage to create multiple specialist reels.
Choose what style of reel is the best fit for you, and then let’s begin.
PART 2: 7 Steps for crafting a remarkable reel
STEP 1. Gather everything

Gather every piece of footage you’ve had a hand in creating, at the highest resolution available (ideally at least 1920×1080), and drag them all into one folder on your computer.
If you’re creating a specialist reel, gather only the footage that relates to your specialty. If you’re creating a generalist reel, throw it all in.
STEP 2. Chop up your work
Open each piece of footage in the video editor of your choice, and export your favorite shots and sequences as individual high-resolution video files. Look for shots/sequences that:
Display a high degree of skill – These shots show you’re a professional.
Are emotionally engaging – These shots stick with an audience.
Are beautiful – These shots show you have good taste.
Feature a well-known brand, celebrity or property – These shots show you’ve been trusted, creatively, to represent a big client.
STEP 3. Rate your shots
Now, take a deep breath, open your folder, and, as objectively as you can, rate the quality of each piece of work. Here’s the 4-point scale I use:
A – Best work. I’m proud to show this off.
B – Good work. Not my best, but I’m happy with it.
C – Okay work. Has issues, but it’s not bad.
D – Bad work.
It’s important to stay as objective as possible. The audience doesn’t know about all the hours, emails, and energy bars that went into every shot of your reel. We only see the end result. So, ask yourself: If this were someone else’s footage, how would I rate their work?
STEP 4. Storyboard your reel
Now it’s time to organize.
Move all your computer’s desktop files into a separate folder so you have a clean workspace. Then drag all your exported clips onto the desktop, like you’re spreading them out across a table. Using your letter ratings as your guide, order them this way:
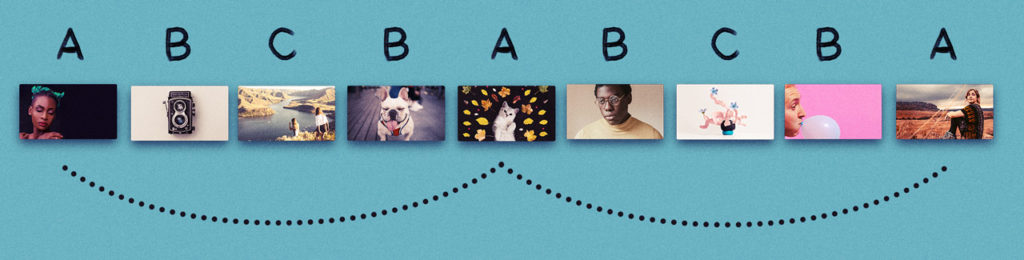
A: Put one or two of your best As at the front, one A at the end, and then evenly space your remaining As.
B & C: In between your As, arrange your Bs and Cs in an ascending and descending style (as though As are your “tent pole” shots and Cs hang down as your ‘low points’). For example, your order might look like:
If possible, avoid including Cs altogether. A stronger, shorter reel full of As and Bs will represent you better than a longer reel that’s watered down by unnecessary Cs.
D: Remove these. Your reel showcases the best of what you can do, and you shouldn’t include any ‘bad’ shots in your reel.
Identify your themes, feelings, and skill sets
With your initial storyboard laid out, ask yourself, “What does this collection of clips say about me?”
- Are there consistent themes running through my work?
- How does this collection of clips make me feel?
- What skills are on display at the forefront of my work?
A consistent theme, feeling, and/or skill set will make your reel more memorable. If some shots don’t fit your T/F/S, try rearranging or removing shots until your storyboard feels cohesive.
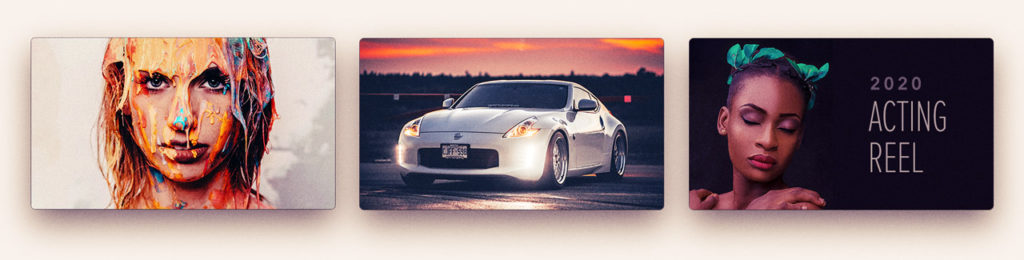
Here’s a Reel with a remarkably cohesive T/F/S on display:
Once you’re happy with the overall flow of your shots, take a screenshot of your desktop, and let this serve as your storyboard.
STEP 5. License a music track
Find a few music tracks (cue Music Vine!) that pair well with the theme/feeling of what you’ve storyboarded, and download preview tracks to try them out in your edit.
Some things to keep in mind when selecting potential tracks:
Over-scoring, Under-scoring, or No-scoring?
Your type of reel and the amount of dialogue and pre-existing music in your footage will suggest how much of the “audio space” your music track should take up.
Over-scoring
If your reel is primarily visual (cinematography, animation, VFX, etc.), you may choose to mute the audio on the majority of your footage and make the music track your “over-score” — the primary thing you hear.
Under-scoring
If your footage includes sound effects or dialogue that you’d like to hear in your reel, you’ll want a track to “under-score” your pre-existing audio — a track that doesn’t take up too much ‘audio space’ with instruments and vocals that can clash with your footage audio. Rhythm-oriented and instrumental tracks are often a good fit for underscoring.
Here’s a Reel that does an excellent job incorporating SFX with their under-score:
No-scoring
If you’re an actor, director, sound designer, etc. and your footage already has important dialogue, sound effects, and music baked in, don’t put a separate music track over the existing music. You can either go without music, or include it at the beginning and end of your reel.
STEP 6. Edit your footage
Using your storyboard as your guide, load your footage into the video editing program of your choice, and edit your footage in time with your preview music tracks.
Try a few different preview music tracks to see which one feels most natural alongside your footage. If your music track is longer than your footage, listen for a repeating section in the track that you can cleanly cut out. Remember: you’re looking for a final reel that’s between 1-3 minutes, but shorter is usually better.
Once you’ve picked your favorite preview track, edit your footage from the beginning and look for places to cut your footage in time with the rhythm of the music. Cutting on beats and half-beats makes your edit feel intentional — like the music was made for the footage. You can even (slightly) speed up or slow down your footage to make it match the beat better.
One note: Don’t make your cuts so quick that a viewer isn’t seeing enough of a shot to easily judge your work. A reel shows us what you can do — not how well you can edit a music video.
Transitions
If you’re an animator, editor, or motion designer, consider adding a few transitions to make your reel feel more cohesive. Use these sparingly you don’t want to overshadow your footage with too many zip-pans and star-wipes.
Title and end cards
Add a title card and end card to the beginning and end of your reel. These don’t need to be complex, but they should be clean and visually appealing. If you’re not a designer, ask one to help you pick a clean font and arrange the following over a simple background:
Title card:
<Your Name>
<YEAR><SPECIALTY><REEL>
End card:
<Your Name>
<Contact info and/or website>
Still title and end cards are perfectly fine, but if you’d like your text to move, consult with an editor or motion designer, or Google “title templates.”
Additional text & captions
If you’re editing a “Generalist reel” where your role in a given shot is unclear, it can help to include captions in the corners of your footage that clarify your involvement in the shot.
If your cuts are too quick to read this text, you can list this information in the description of your video. For example:
<timecode 1> : Director, Cinematographer
<timecode 2> : Cinematographer
<timecode 3> : Lighter
Set it aside. Get feedback. Revise.
Once you have a first draft that you’re happy with, set it aside for a day or two. When you come back to it with fresh eyes, you’re likely to see places where you can improve.
If you know someone who can give you good, honest feedback, ask them what they think, accept their feedback graciously, and incorporate whichever notes you feel are best.
STEP 7. Export and share widely
License your music track, export your video at a high-resolution, and save the most eye-catching frame of your footage to use as your thumbnail image.
Remember, when displayed many places online, your thumbnail will often appear no bigger than a postage stamp — surrounded by hundreds of other postage-stamp-sized thumbnails:
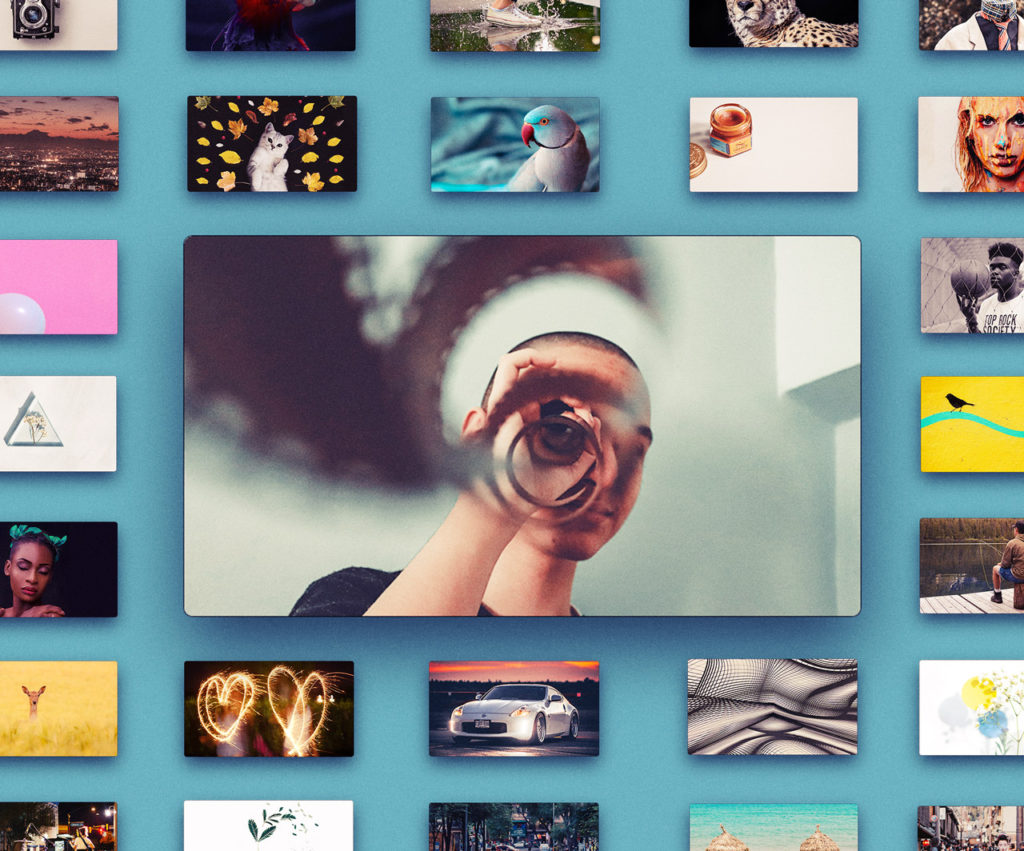
Thumbnails that stand out:
- Often are close-ups or simple compositions that read clearly at a small size
- Often include sharply defined, contrasting colors
- Often include one subject
- Often include eye-catching subject matter
- If they include text, there are very few words and those words are large and legible
Thumbnails that get lost:

- Wide-shots with complex compositions that blur together at a large size
- Similar colors that blend together
- Include lots of small subjects
- Include mundane, unremarkable subject matter
- Include lots of small text that’s difficult to read at a small scale
Upload your reel to your portfolio, YouTube, Vimeo and share it widely. Email it to past and potential employers — letting them know you’re available for more work.
If you’ve done your job right and crafted a remarkable reel, people will be happy to watch it.
Final words
There’s an ocean of reels out there, and I hope these 7 steps help as you navigate crafting a remarkable one. If you follow these steps on your own reel, let me know on Vimeo, and I’ll be the first to give it a ‘like.’ Happy editing!
About the author

Jared Norby

Jared is a freelance Animation Director, Art Director, and Animation Generalist based in Los Angeles. He’s created work for Disney, Marvel, Mattel, Timberland, and Toyota. And, in his free time, he directs and produces original animated TV pilots.