Into Darkness
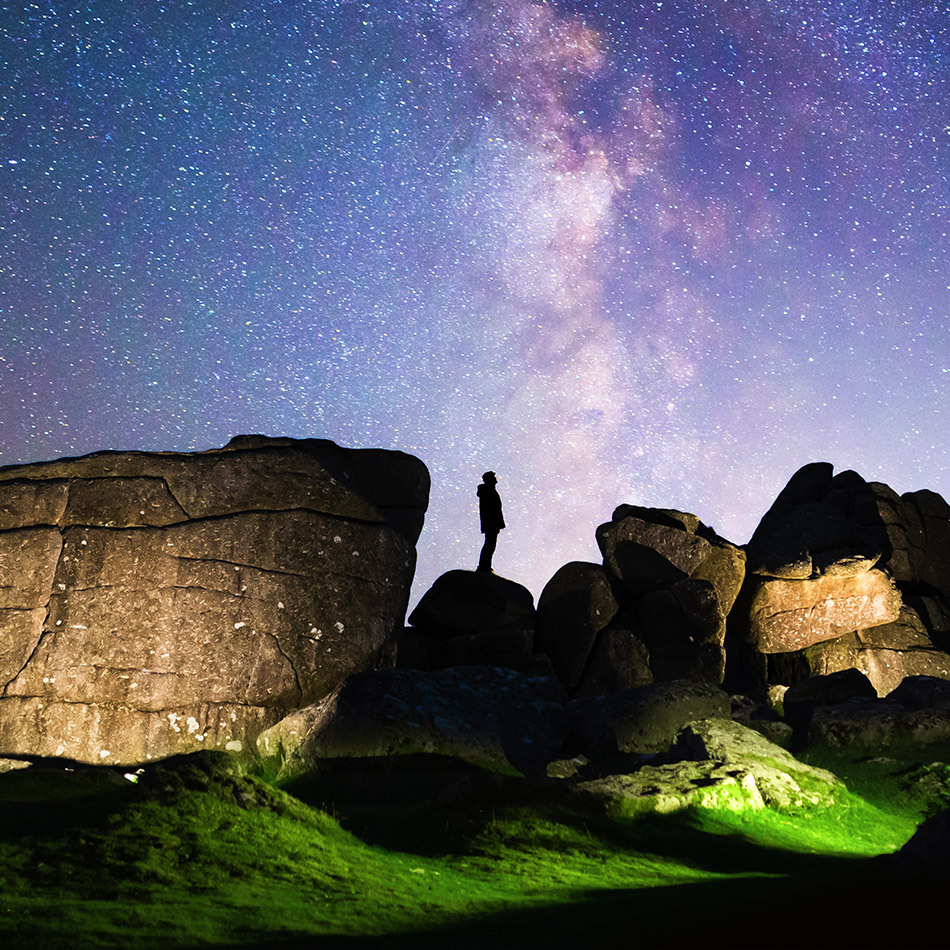
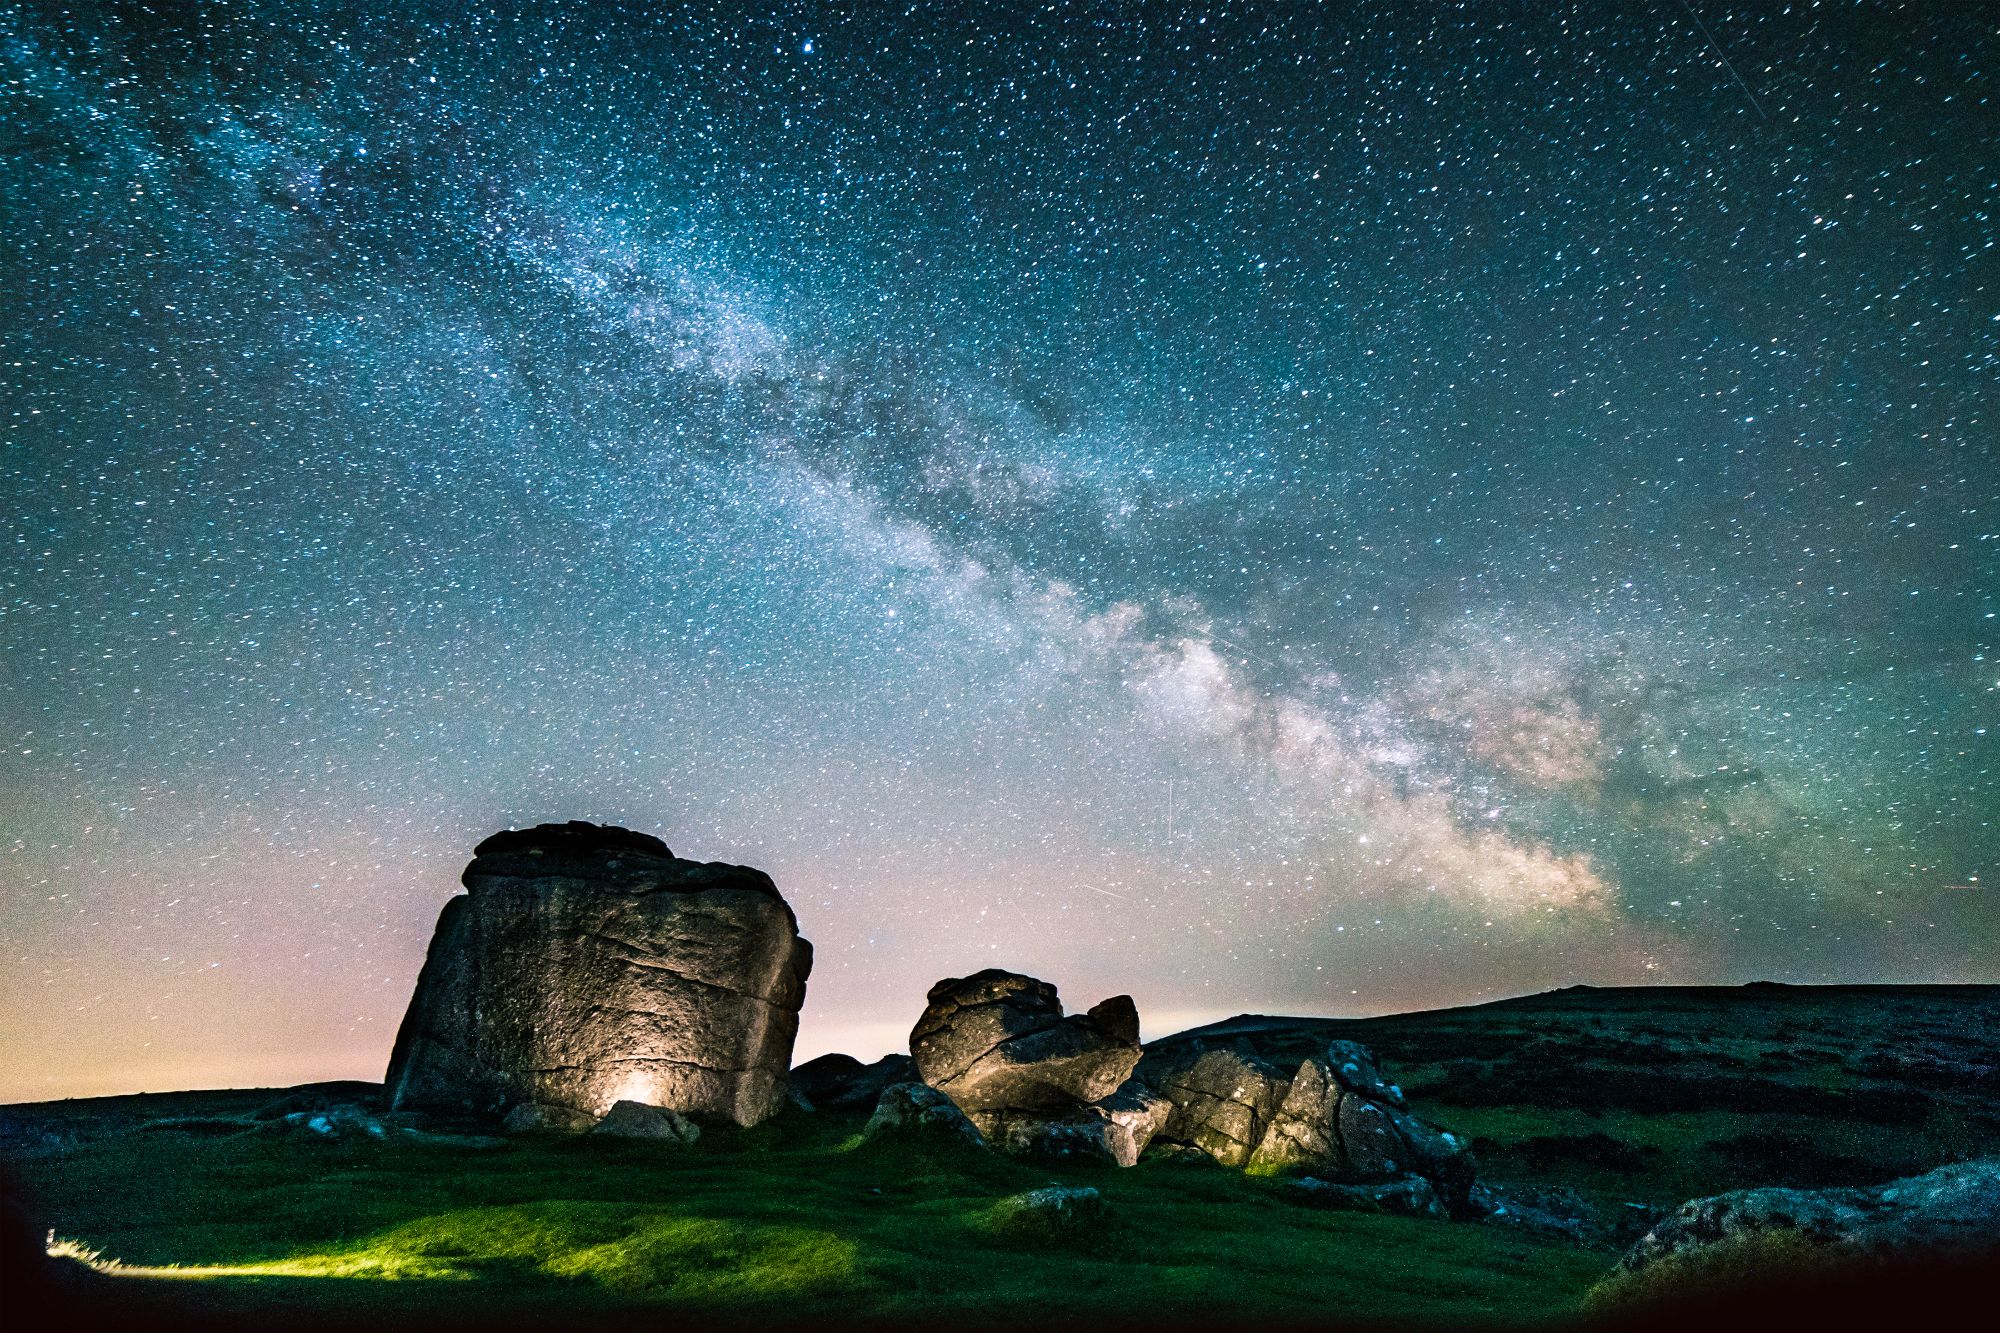
I remember my first attempt at shooting the Milky Way. It was also the first time I’d realised that the core of our galaxy could be seen with the naked eye. This was in Dartmoor National Park in South-West England.
I’d worked as a filmmaker for years and also dabbled in still and time lapse photography, but when it came to astrophotography I had very little idea what I was doing. I randomly pointed my Micro Four Thirds camera and f/3.5 fisheye lens (hardly an optimal astrophotography setup) at the sky and hoped for the best.
I found what I guessed to be the Milky Way through an exercise in trial and error. After taking a few duds, I got it. There it was – a mass of hundreds of billions of stars 100,000 lightyears wide, reduced to a faint misty smear a couple of inches long in my viewfinder. My results were pretty lacklustre by anyone’s standards but the experience of it all resonated with me and I was unashamedly chuffed with my efforts. I spent the whole night out there, trying to get the best shot I could before the rising sun washed away the stars. I was hooked, but knew I had a long way to go.
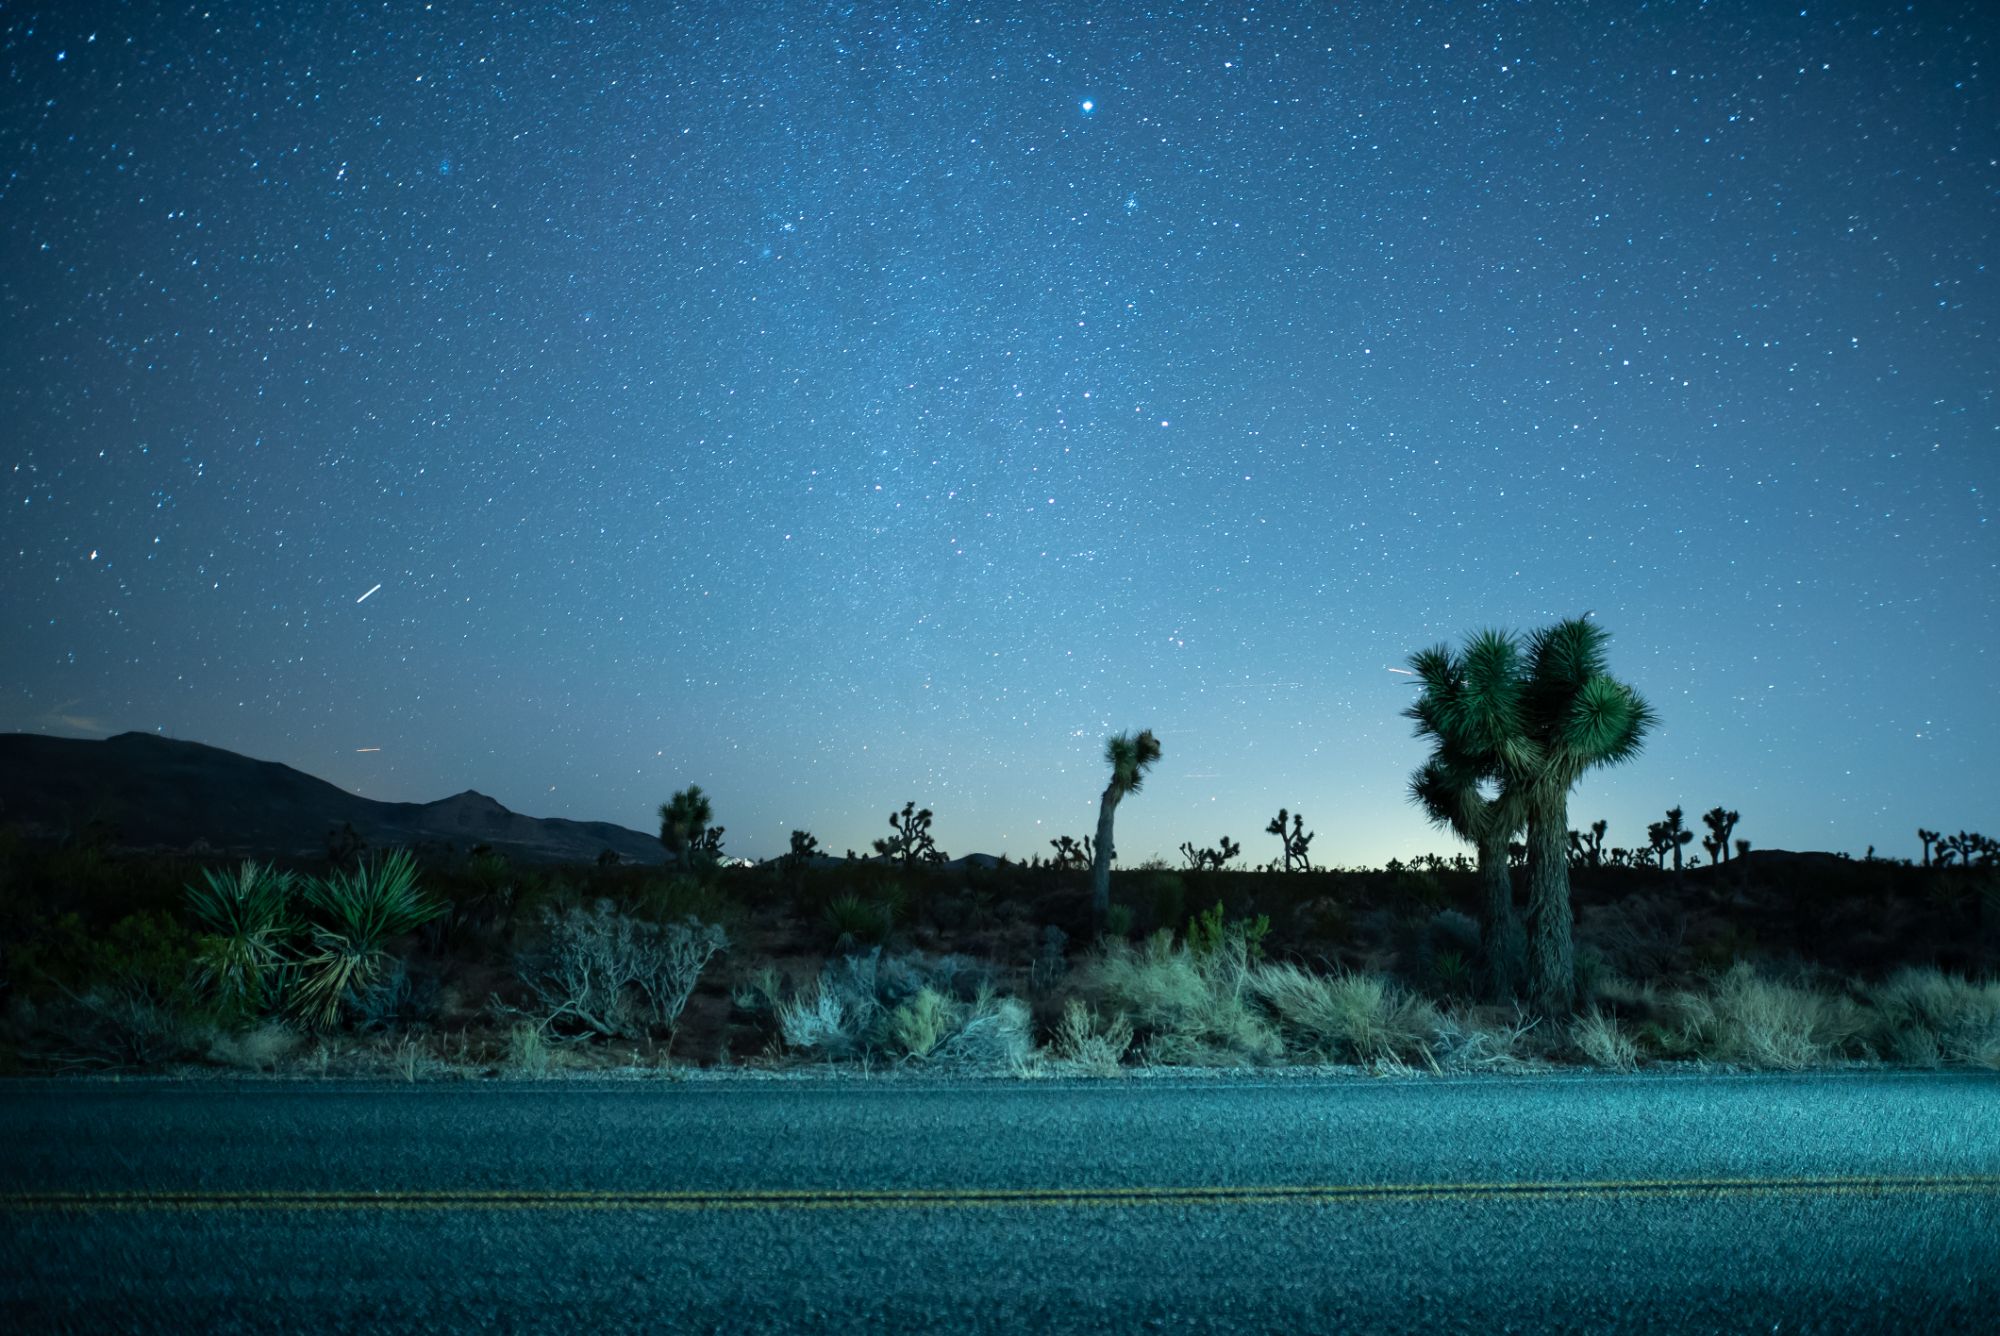
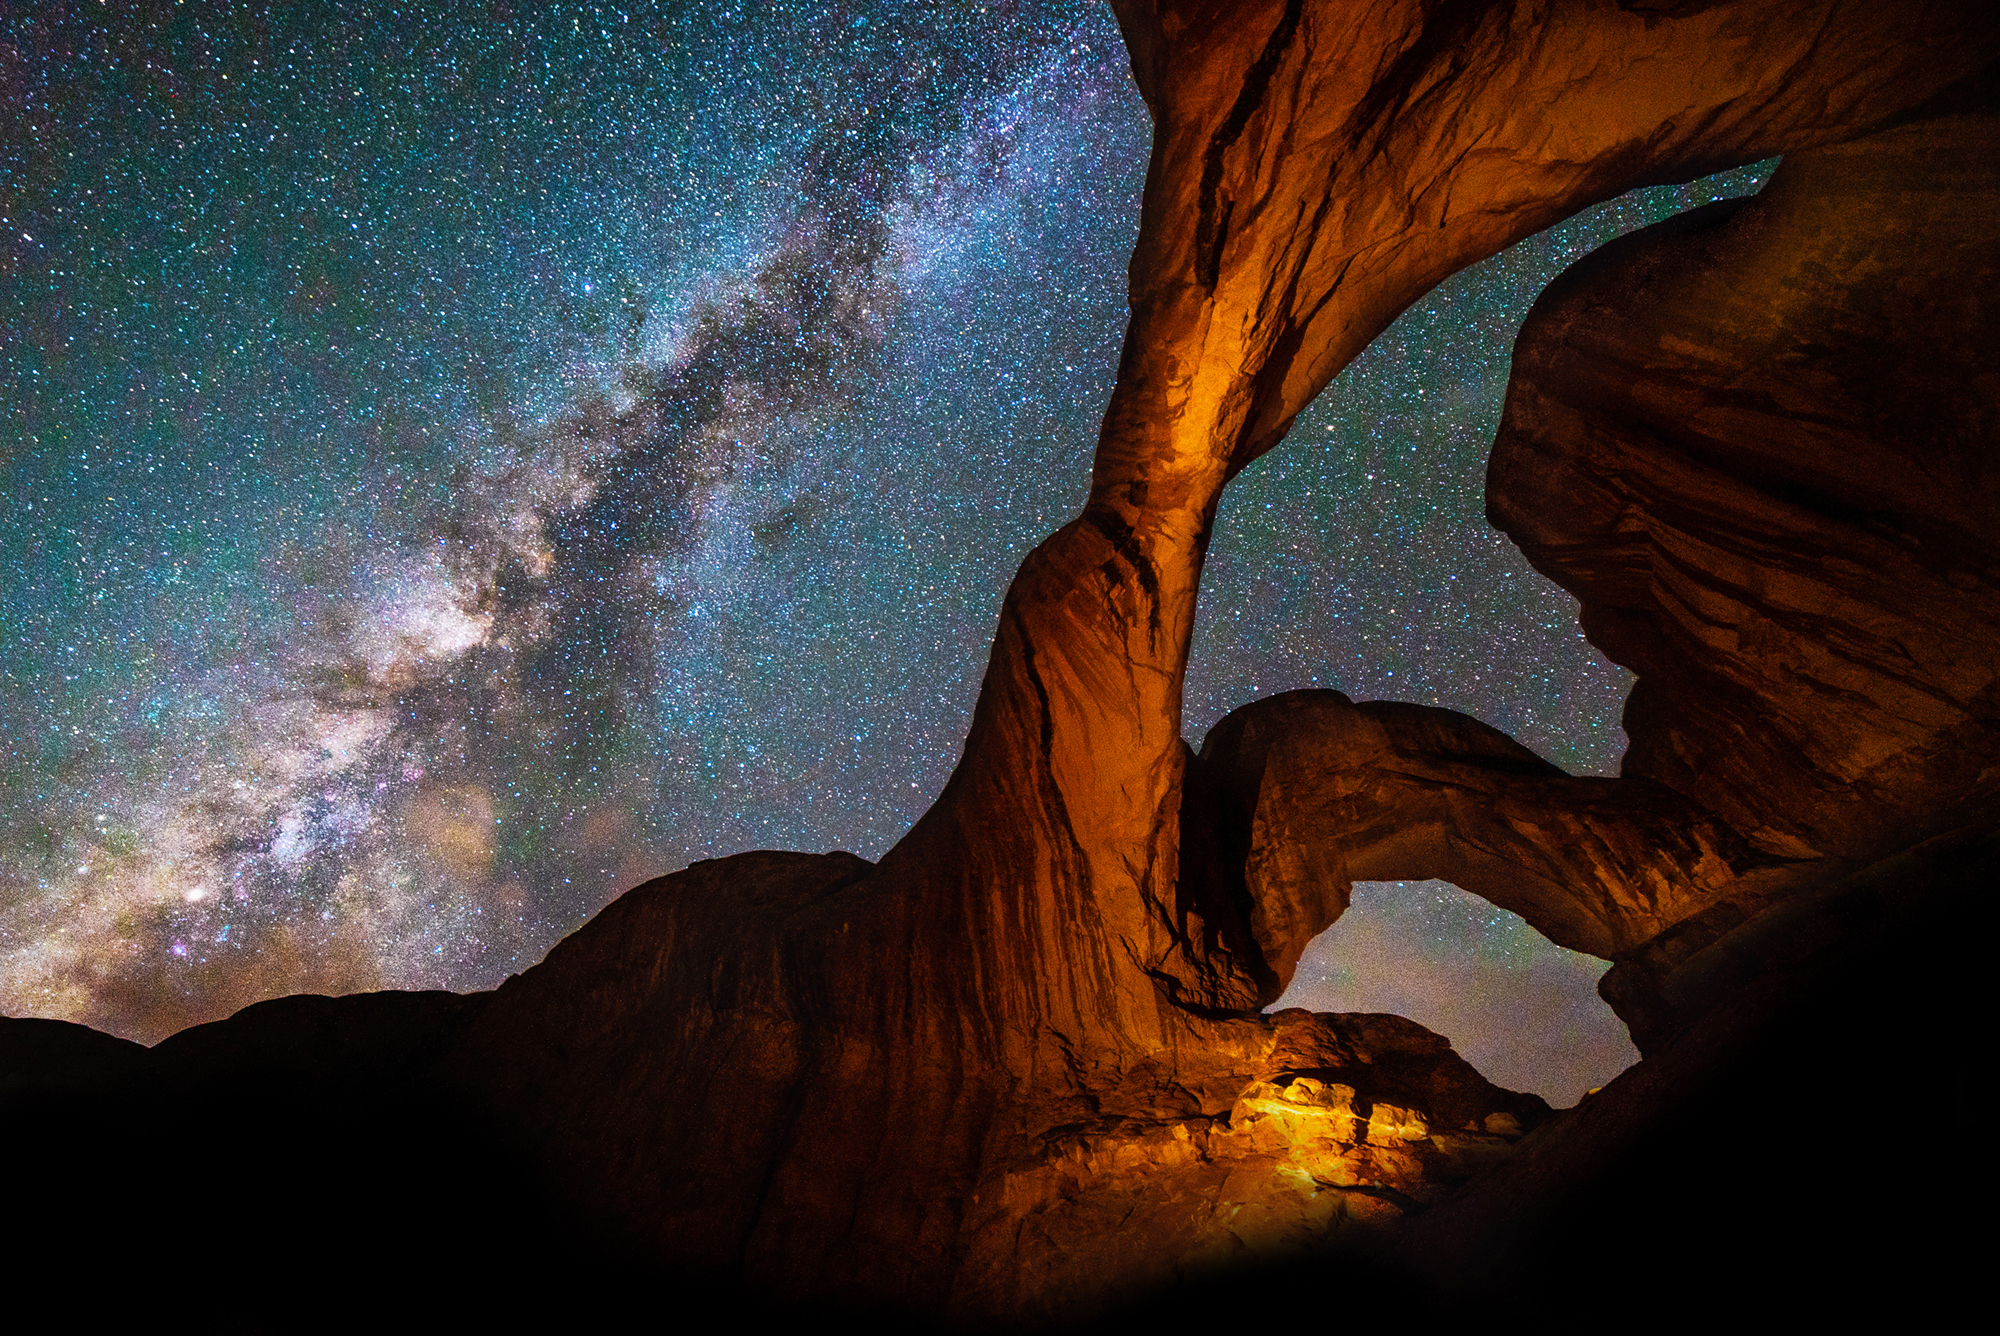
Fast forward nearly three years later and I’ve spent many a long night under the stars, slowly honing my craft and learning how to best capture the night sky for both stills and time lapse. I’ve travelled to some amazing dark sky locations around the world from the Welsh Brecon Beacons to California’s Joshua Tree and Utah’s Arches National Park. I’d like to share with you what I’ve learned over this time, and give you a quick insight into planning a night sky shoot, as well as the gear and settings I use. It may sound daunting, but in practice it’s surprisingly simple.
Preparation
As you can imagine, the key to star photography is finding dark skies far enough away from cities and other sources of light pollution. This includes the moon, so you’ll need to plan your shoot for when the moon is below the horizon or in the days surrounding a new moon.
Free apps like Moon Phase and Stellarium are really useful tools in determining when and where to shoot, and allow you to anticipate the path of the Milky Way, moon, planets, other stars and deep sky objects. The core of the Milky Way rises higher as we progress through Spring into summer, with April to September being the optimal time to view it. This is especially true here in the Northern Hemisphere.
Weather
The weather is not your friend. It will ruin your shoots. Fact. When it’s not raining, it’s cloudy. When it’s not cloudy there’s dew and fog and moisture to contend with. Buy a lens warmer. Seriously. This is critical for time lapse work. I will never forget the three hours I spent lying on the cold wet Dartmoor ground wiping the water from my lens with a cloth in between exposures. I haven’t forgotten my lens warmer since.
Gear
You don’t have to break the bank to shoot the Milky Way. Any DSLR or mirrorless camera and kit lens will get you something. The cell phone in your pocket may even be up to the task. However, for the best results you’ll want a camera with a large sensor and fast lens with an aperture of at least f/2.8. I’ve shot the majority of my work on a Sony A7S and Canon 6D due to their full frame sensors and reputable low light performance. My lenses of choice have been the Sigma 24mm f/1.4 Art, Samyang 14mm f/2.8 and Irix 15mm f/2.4 Blackstone, due to their speed and wide field of view.
Settings
I always shoot RAW as it gives me so much more scope when it comes to editing. I shoot wide open for maximum light, and with the lowest ISO possible to reduce noise. I’ve found this particularly necessary for time lapse as any noise in my work is going to be accentuated in a moving image. For time lapse I aim for ISO 1600 or less. For stills I often push the ISO higher, up to 3200 or 6400 if needed. I’ll often cycle through a few different white balances until I find one I feel compliments that particular scene, but I find in the realms of 5500k daylight is usually a safe bet.
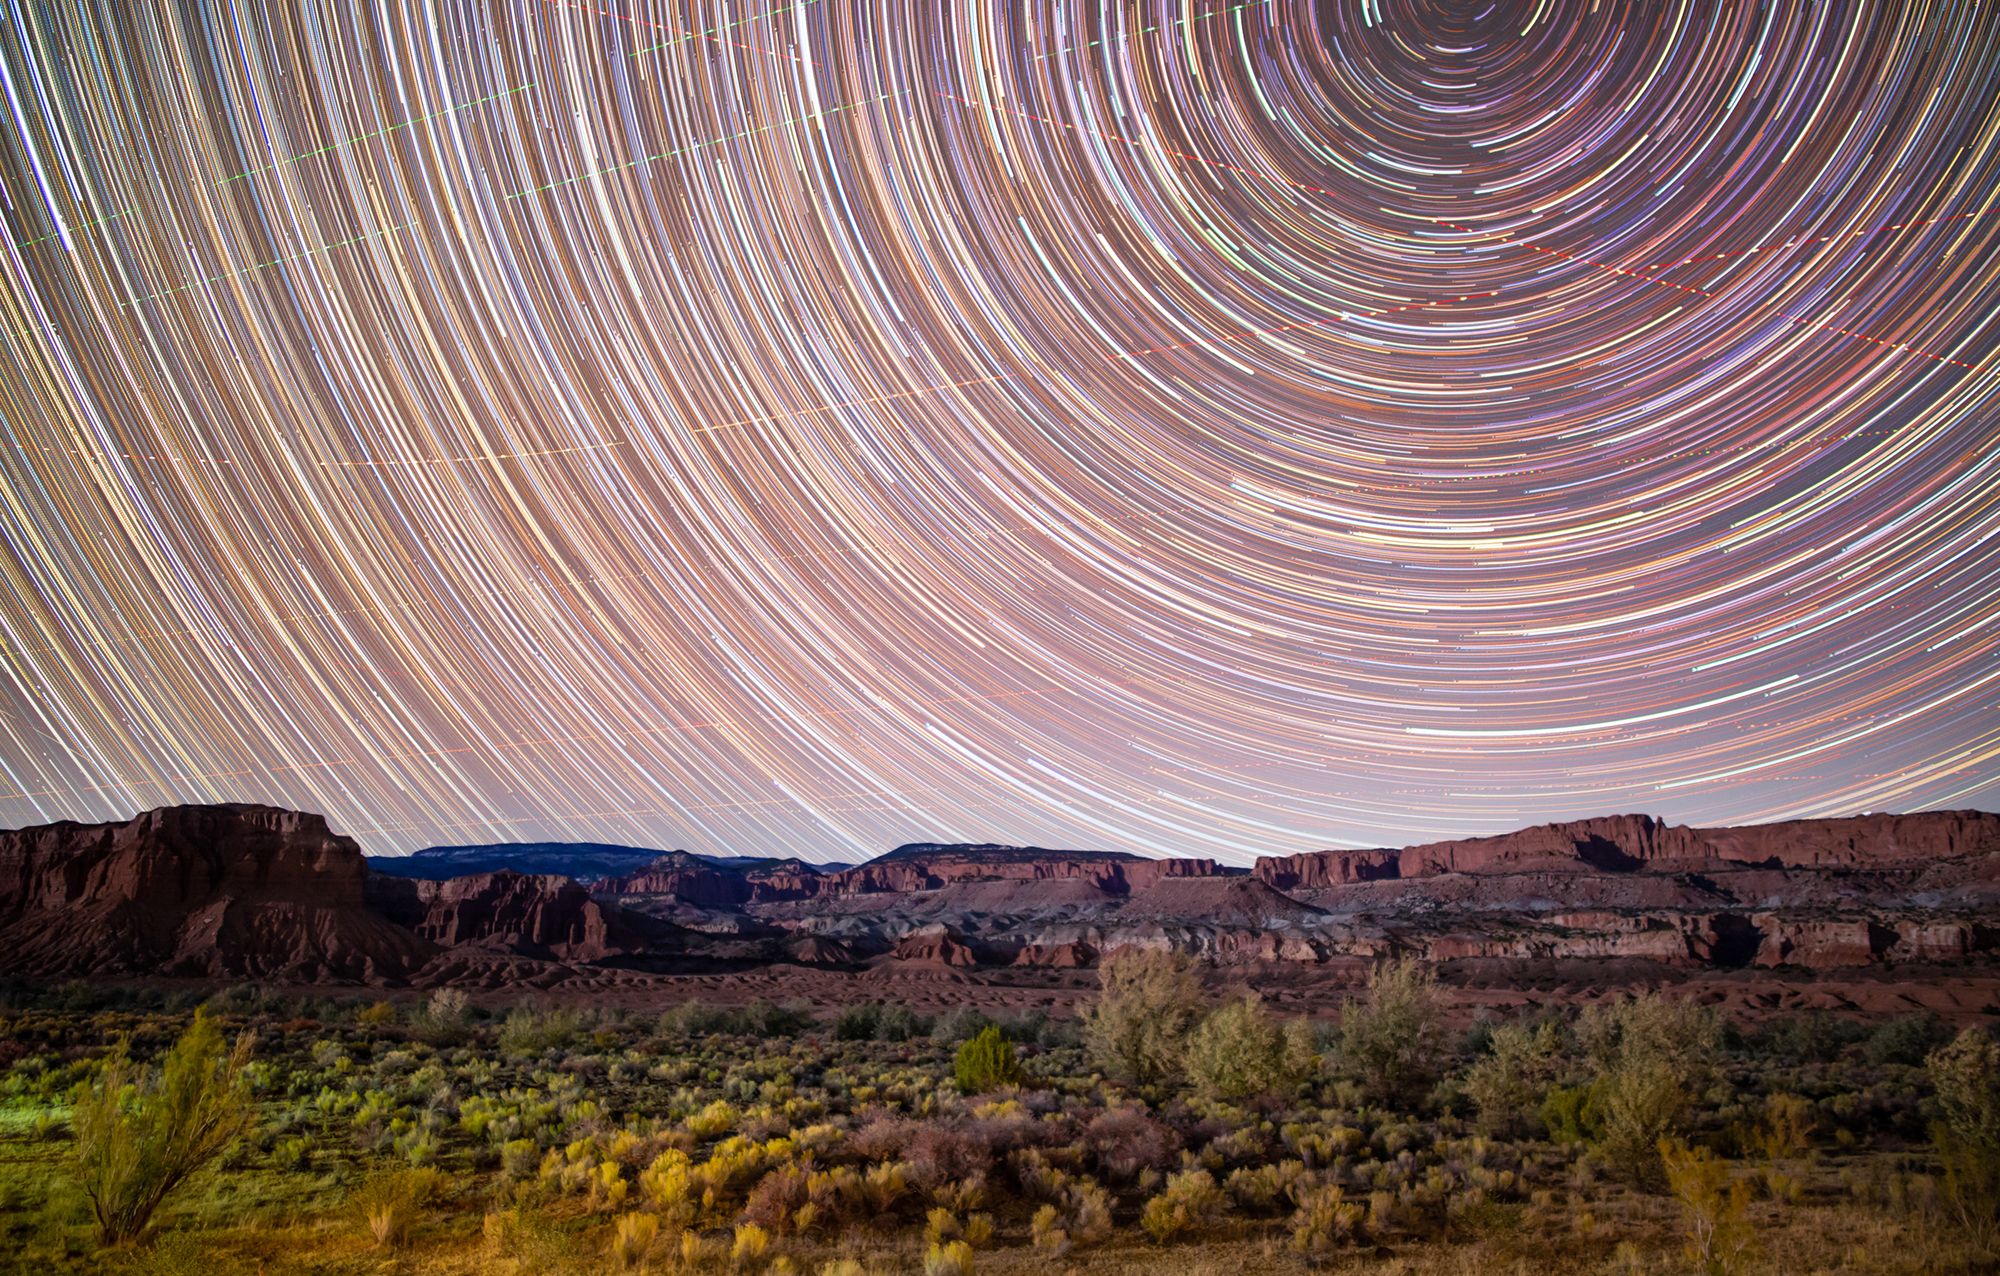
“The 500 Rule”
If you leave your shutter open for too long, you risk getting “star trails”. Great, if that’s what you’re looking for, but annoying if you’re not. To achieve pinpoint-sharp stars, it’s worth bearing in mind “the 500 rule” in determining the maximum exposure time for your particular setup. All you have to do is take 500 and divide it by the focal length of your lens.
For example: 500 / 24 = 20.8, so for a 24mm lens, use a maximum exposure time of 20 seconds.
This works for full frame cameras, but if you’re shooting with a crop frame sensor, you’ll need to take into account the crop factor and how that affects the field of view for your setup. Canon APS-C cameras for example have a crop factor of 1.6, meaning a 24mm lens has an effective 38mm field of view (1.6 x 24 = 38.4).
500 / 38 = 13.1, so your maximum exposure time would be 13 seconds.
Essentially, the wider your lens, the longer you can leave your shutter open. Some people prefer the slightly more lenient “600 rule”. I wouldn’t be completely beholden to either of these, but it’s good to at least be aware of them and to know the limitations of your setup.
Right, that’s enough maths.
Show Me The Light
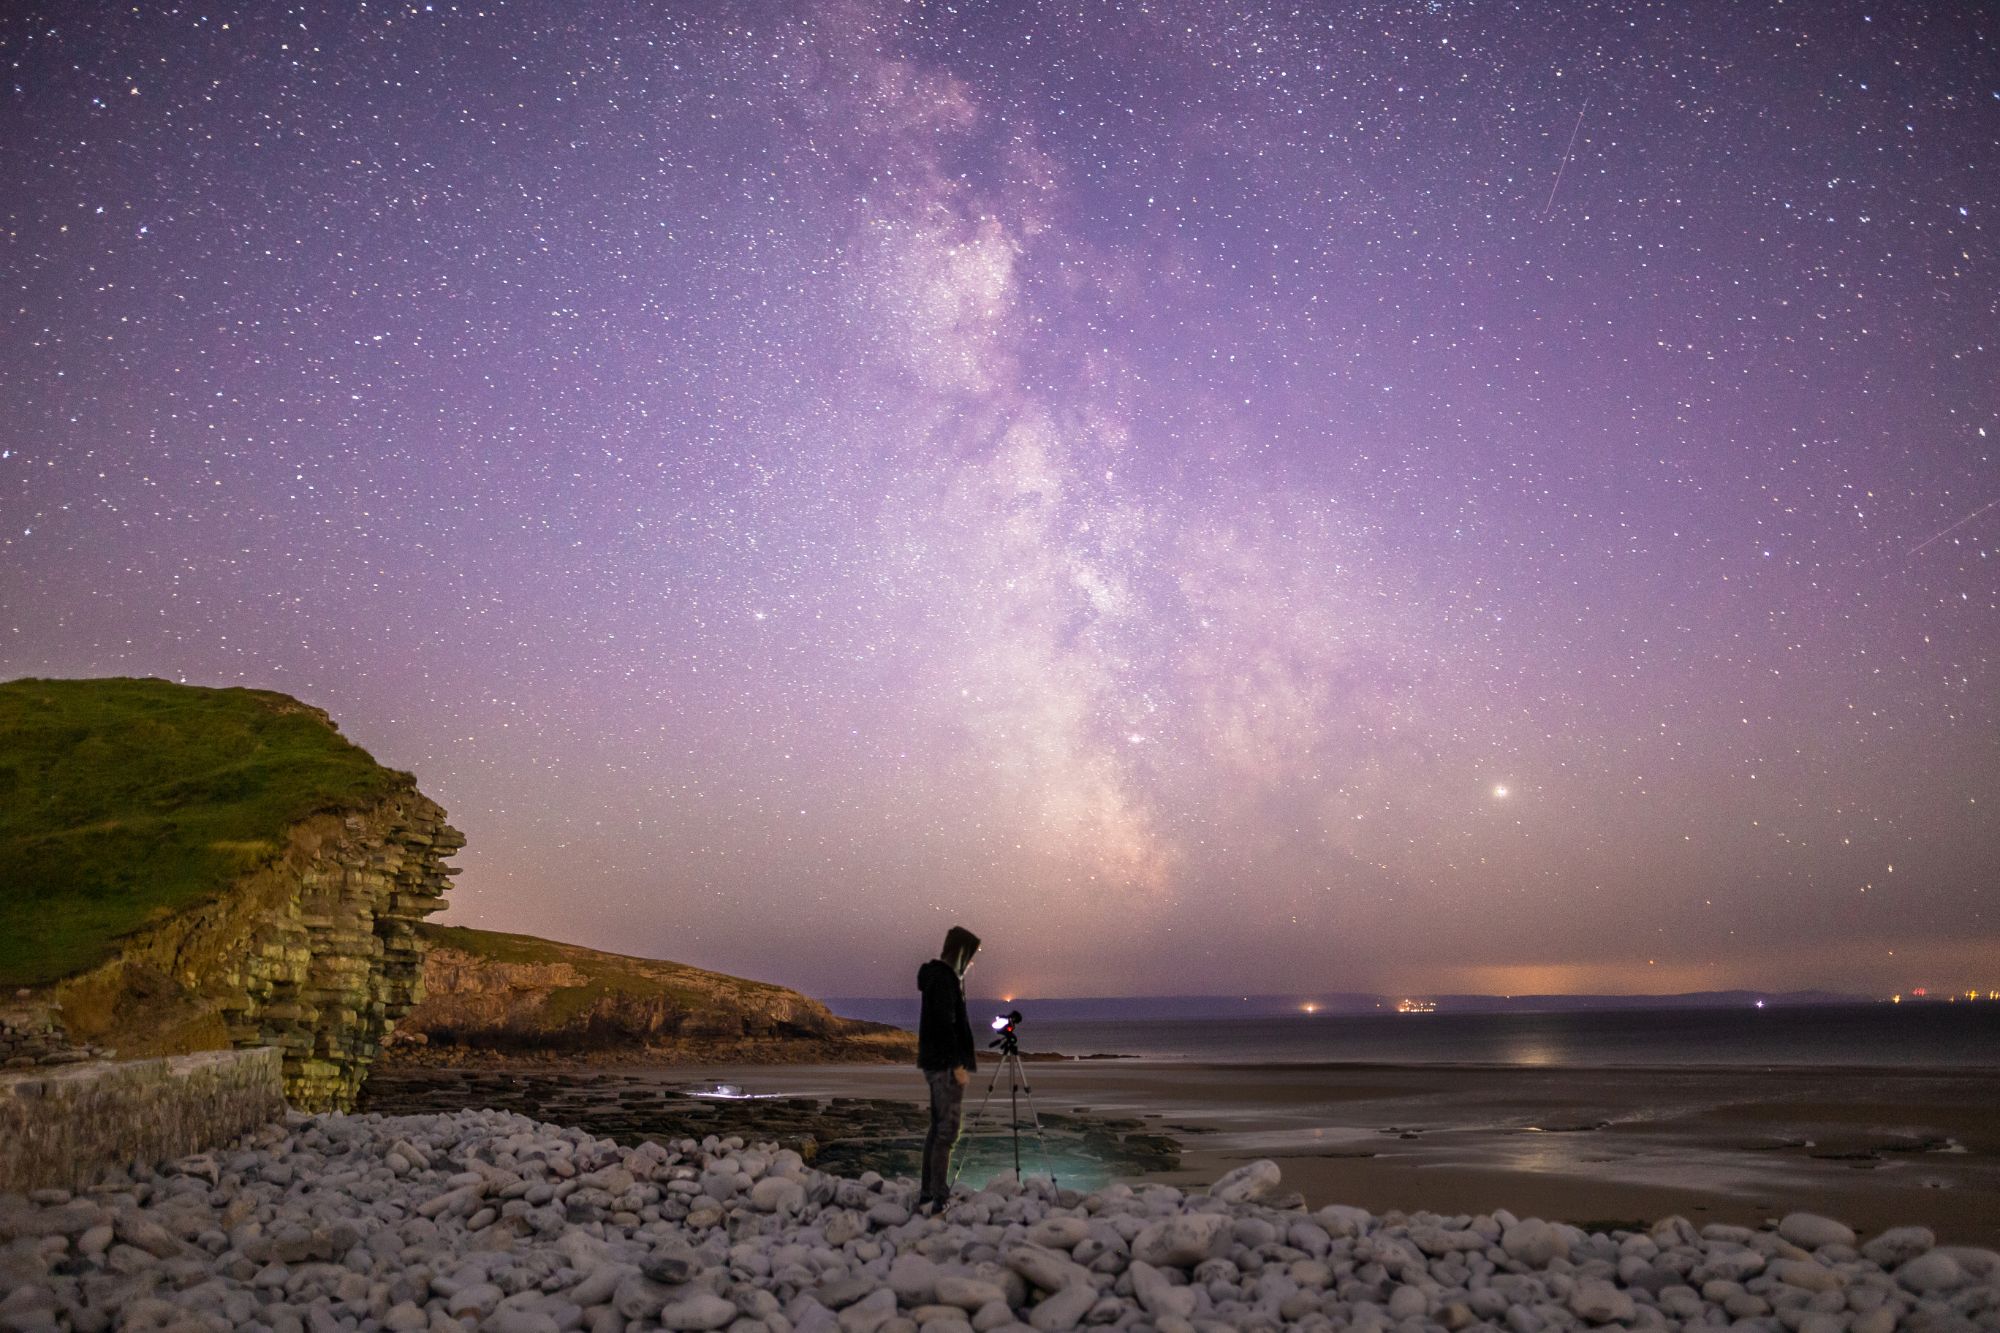
For me, it’s not all about the night sky. One of the focal points of my work is the use of light painting. In a way I think of my astrophotography work as traditional landscape photography in the sense that I always look to incorporate interesting foreground elements, only with the night sky as a backdrop.
There are endless approaches to lighting the foreground in interesting ways. I’ll use a torch or flashlight, my headlamp, cellphone, or the headlights from a fortuitous passing car. I bought these cheap little LED lights from Amazon. I dim them down to the faintest glow barely visible to the naked eye, but over the course of a 20 or 30 second long exposure, enough power is accumulated to light an entire scene. I’ll place these just out of frame, or hide them behind rocks or branches or in cracks. A little creativity here can go a long way in making your images more dynamic and three-dimensional. It’s this use of light I believe truly makes my work stand out from the crowd.
These techniques are demonstrated in my latest astrophotography film Night Light, which won me a Vimeo Staff pick and ‘Best of the Month’ badge.
“Our team sees so many star scape videos and this one is a cut above in so many ways”
Meghan Oretsky, Vimeo Curator

Night Light lies somewhere between a slideshow and a time-lapse. The idea was to take a series of still photographs, and use a mixture of light painting and post production techniques to create the illusion of fluid motion. In reality, each 8-10 second shot consists of as little as 3-5 still photographs – a far cry from 24 frames per second! I’d frame my shot and light an area of the foreground – a rock, a tree, a piece of architecture – then light another area, keeping the exact same frame so that the images can be overlaid in post. As long as my tripod did its job, I should have a handful of perfectly aligned exposures of the same subject, with different lighting in each. I’ll pick out my favourites, run them through Lightroom, bring them into Premiere and cross fade between the various takes, creating a shift in the light, and the effect of a seamlessly moving video out of a mere handful of stills.
In addition to that, I utilised some subtle parallax techniques to displace different elements of the image and add a little extra animation and depth. You can watch the film below.
Looking back to that first night in Dartmoor, I knew nothing of the 500 rule or moon cycles or what camera or lens was best. But that didn’t put me off. Similarly, I hope the ideas and information I’ve outlined here not deter but inspire you. Don’t feel beholden to any of what I’ve shared – these are merely techniques I’ve developed and found to work best for me. You may well find other approaches or gear that work for you. Regardless of the stage you’re at with your night sky photography, hopefully you’ve found some value or insight here.
There’s really nothing quite like night sky photography. It’s challenging and unpredictable and humbling and awesome. It requires patience and discipline and sleepless nights and luck and more patience. But I’ve always found it so rewarding. I think for me, the magic lies in the fact that the camera captures so much more than the human eye can see, and you never quite know what you’re going to get. I implore you to get away from the lights of the city and try it. Maybe you’re lucky enough to live near a dark sky location but have never tried it. In that case, what are you waiting for? It’s the perfect escape from reality.
About the author
Arthur Cauty


Arthur Cauty is a multi-award-winning filmmaker, director & cinematographer, an avid traveller, pro-wrestling enthusiast and musician based in Bristol, UK.